![]()
![]()
![]()
|
Welcome to the New Republic Intelligence Agency. This area of the Vigilant is off limits to all but New Republic personnel. Select from the topics below:
|
|
The CRS Vigilant is proud to be able to bring you this detailed analysis of starfighters, capitol ships, platforms,and other various craft and containers in XvT. We have grouped the charts in order of shields to no shields, and then shields down to hull destruction. Please click on the appropriate link to bring up the desired ship information.
|
|
||||||||||||||||||||||||||||||||||||||||||||||||||||||||||||||||||||||||||||||||||||||||||||||||||||||||||||||||||||||||||||||||||||||||||||||||||||||||||||||||||||||||||||||||||||||||||||||||||||||||||||||||||||||||||||||||||||||||||||||||||||||||||||||||||||||||||||||||||||||||||||||||||||||||||||||||||||||||||||||||||||||||||||||||||||||||||||||||||||||||||||||||||||||||||||||||||||||||||||||||||||||||||||||||||||||||||||||||||||||||||||||||||||||||||||||||||||||||||||||||||||||||||||||||||||||||||||||||||||||||||||||||||||||||||||||||||||||||||||||||||||||||||||||||||||||||||||||||||||||||||||||||||||||||||||||||||||||||||||||||||||||||||||||||||||||||||||||||||||||||||||||||||||||||||||||||||||||||||||||||||||||||||||||||||||||||||||||||||||||||||||||||||||||||||||||||||||||||||||||||||||||||||||||||||||||||||||||||||||||||||||||||||||||||||||||||||||||||||
|
Object Type
|
SBD Rating |
Total
number of individual weapon or ordinace hits to drop object to 0
percent shields
|
|||||||||
| Max Laser |
Min Laser |
Max Ion | Min Ion | Missile | A.Missile | Torpedo | A.Torp | H.Rocket | S.Bomb | ||
| X-Wing | 50 | 9 | 25 | 9 | 25 | 2 | 1 | 1 | 1 | 1 | 1 |
| Y-Wing | 75 | 13 | 38 | 13 | 38 | 3 | 2 | 1 | 1 | 1 | 1 |
| A-Wing | 50 | 9 | 25 | 9 | 25 | 2 | 1 | 1 | 1 | 1 | 1 |
| B-Wing | 100 | 17 | 50 | 17 | 50 | 4 | 2 | 1 | 1 | 1 | 1 |
| Z-95 | 20 | 4 | 10 | 4 | 10 | 1 | 1 | 1 | 1 | 1 | 1 |
| T/F | 0 | 0 | 0 | 0 | 0 | 0 | 0 | 0 | 0 | 0 | 0 |
| T/I | 0 | 0 | 0 | 0 | 0 | 0 | 0 | 0 | 0 | 0 | 0 |
| T/I (SHD) | 30 | 5 | 15 | 5 | 15 | 1 | 1 | 1 | 1 | 1 | 1 |
| T/B | 0 | 0 | 0 | 0 | 0 | 0 | 0 | 0 | 0 | 0 | 0 |
| T/B (SHD) | 60 | 10 | 30 | 10 | 30 | 2 | 1 | 1 | 1 | 1 | 1 |
| T/A | 40 | 7 | 20 | 7 | 20 | 2 | 1 | 1 | 1 | 1 | 1 |
| GUN | 100 | 17 | 50 | 17 | 50 | 4 | 2 | 1 | 1 | 1 | 1 |
| T-Wing | 20 | 4 | 10 | 4 | 10 | 1 | 1 | 1 | 1 | 1 | 1 |
| R-41 | 30 | 5 | 15 | 5 | 15 | 1 | 1 | 1 | 1 | 1 | 1 |
| SHU | 100 | 17 | 50 | 17 | 50 | 4 | 2 | 1 | 1 | 1 | 1 |
| E/S | 120 | 20 | 60 | 20 | 60 | 4 | 2 | 2 | 1 | 1 | 1 |
| TRN | 80 | 14 | 40 | 14 | 40 | 3 | 2 | 1 | 1 | 1 | 1 |
| ATR | 200 | 34 | 100 | 34 | 100 | 7 | 4 | 2 | 2 | 1 | 1 |
| ETR | 250 | 42 | 125 | 42 | 125 | 9 | 5 | 3 | 2 | 1 | 1 |
| SPC | 150 | 25 | 75 | 25 | 75 | 5 | 3 | 2 | 1 | 1 | 1 |
| CRV | 400 | 67 | 200 | 67 | 200 | 14 | 7 | 4 | 3 | 2 | 1 |
| M/CRV | 400 | 67 | 200 | 67 | 200 | 14 | 7 | 4 | 3 | 2 | 1 |
| FRG | 2560 | 427 | 1280 | 427 | 1280 | 86 | 42 | 26 | 17 | 8 | 4 |
| M/FRG | 2560 | 427 | 1280 | 427 | 1280 | 86 | 42 | 26 | 17 | 8 | 4 |
| ISD | 4800 | 800 | 2400 | 800 | 2400 | 160 | 78 | 48 | 32 | 14 | 8 |
| VSD | 3200 | 534 | 1600 | 534 | 1600 | 107 | 52 | 32 | 22 | 10 | 5 |
| INT | 2880 | 480 | 1440 | 480 | 1440 | 96 | 47 | 29 | 19 | 9 | 5 |
| SSD | 96000 | 16000 | 48000 | 16000 | 48000 | 3200 | 1549 | 942 | 632 | 273 | 150 |
| CRS | 3840 | 640 | 1920 | 640 | 1920 | 128 | 62 | 38 | 26 | 11 | 6 |
| CRL | 2560 | 427 | 1280 | 427 | 1280 | 86 | 42 | 26 | 17 | 8 | 4 |
| STRCK | 2560 | 427 | 1280 | 427 | 1280 | 86 | 42 | 26 | 17 | 8 | 4 |
| M/STRCK | 2560 | 427 | 1280 | 427 | 1280 | 86 | 42 | 26 | 17 | 8 | 4 |
| DREAD | 2560 | 427 | 1280 | 427 | 1280 | 86 | 42 | 26 | 17 | 8 | 4 |
| ESC | 2880 | 480 | 1440 | 480 | 1440 | 96 | 47 | 29 | 19 | 9 | 5 |
| TUG | 0 | 0 | 0 | 0 | 0 | 0 | 0 | 0 | 0 | 0 | 0 |
| HLF | 0 | 0 | 0 | 0 | 0 | 0 | 0 | 0 | 0 | 0 | 0 |
| CUV | 0 | 0 | 0 | 0 | 0 | 0 | 0 | 0 | 0 | 0 | 0 |
| CORT | 320 | 54 | 160 | 54 | 160 | 11 | 6 | 4 | 3 | 1 | 1 |
| MURT | 320 | 54 | 160 | 54 | 160 | 11 | 6 | 4 | 3 | 1 | 1 |
| FTR | 480 | 80 | 240 | 80 | 240 | 16 | 8 | 5 | 4 | 2 | 1 |
| CARG | 240 | 40 | 120 | 40 | 120 | 8 | 4 | 3 | 2 | 1 | 1 |
| CNVYR | 280 | 47 | 140 | 47 | 140 | 10 | 5 | 3 | 2 | 1 | 1 |
| MTRNS | 480 | 80 | 240 | 80 | 240 | 16 | 8 | 5 | 4 | 2 | 1 |
| CN/A | 200 | 34 | 100 | 34 | 100 | 7 | 4 | 2 | 2 | 1 | 1 |
| CN/B | 240 | 40 | 120 | 40 | 120 | 8 | 4 | 3 | 2 | 1 | 1 |
| CN/C | 40 | 7 | 20 | 7 | 20 | 2 | 1 | 1 | 1 | 1 | 1 |
| CN/D | 40 | 7 | 20 | 7 | 20 | 2 | 1 | 1 | 1 | 1 | 1 |
| CN/E | 120 | 20 | 60 | 20 | 60 | 4 | 2 | 2 | 1 | 1 | 1 |
| CN/F | 120 | 20 | 60 | 20 | 60 | 4 | 2 | 2 | 1 | 1 | 1 |
| CN/G | 120 | 20 | 60 | 20 | 60 | 4 | 2 | 2 | 1 | 1 | 1 |
| CN/H | 120 | 20 | 60 | 20 | 60 | 4 | 2 | 2 | 1 | 1 | 1 |
| CN/I | 120 | 20 | 60 | 20 | 60 | 4 | 2 | 2 | 1 | 1 | 1 |
| PLT/1 | 3200 | 534 | 1600 | 534 | 1600 | 107 | 52 | 32 | 22 | 10 | 5 |
| PLT/2 | 3200 | 534 | 1600 | 534 | 1600 | 107 | 52 | 32 | 22 | 10 | 5 |
| PLT/3 | 3200 | 534 | 1600 | 534 | 1600 | 107 | 52 | 32 | 22 | 10 | 5 |
| PLT/4 | 3200 | 534 | 1600 | 534 | 1600 | 107 | 52 | 32 | 22 | 10 | 5 |
| PLT/5 | 3200 | 534 | 1600 | 534 | 1600 | 107 | 52 | 32 | 22 | 10 | 5 |
| PLT/6 | 3200 | 534 | 1600 | 534 | 1600 | 107 | 52 | 32 | 22 | 10 | 5 |
| FAC/7 | 3200 | 534 | 1600 | 534 | 1600 | 107 | 52 | 32 | 22 | 10 | 5 |
| R&D | 3200 | 534 | 1600 | 534 | 1600 | 107 | 52 | 32 | 22 | 10 | 5 |
| LASBAT | 3200 | 534 | 1600 | 534 | 1600 | 107 | 52 | 32 | 22 | 10 | 5 |
| WLNCHER | 3200 | 534 | 1600 | 534 | 1600 | 107 | 52 | 32 | 22 | 10 | 5 |
| SHPYD | 9600 | 1600 | 4800 | 1600 | 4800 | 320 | 155 | 95 | 64 | 28 | 15 |
| GPLT | 128 | 22 | 64 | 22 | 64 | 5 | 3 | 2 | 1 | 1 | 1 |
| REPYD | 9600 | 1600 | 4800 | 1600 | 4800 | 320 | 155 | 95 | 64 | 28 | 15 |
| SAT | 0 | 0 | 0 | 0 | 0 | 0 | 0 | 0 | 0 | 0 | 0 |
| Mine/A | 0 | 0 | 0 | 0 | 0 | 0 | 0 | 0 | 0 | 0 | 0 |
| Mine/B | 0 | 0 | 0 | 0 | 0 | 0 | 0 | 0 | 0 | 0 | 0 |
| Mine/C | 0 | 0 | 0 | 0 | 0 | 0 | 0 | 0 | 0 | 0 | 0 |
| Probe | 0 | 0 | 0 | 0 | 0 | 0 | 0 | 0 | 0 | 0 | 0 |
| Nav 1 | 0 | 0 | 0 | 0 | 0 | 0 | 0 | 0 | 0 | 0 | 0 |
|
||||||||||||||||||||||||||||||||||||||||||||||||||||||||||||||||||||||||||||||||||||||||||||||||||||||||||||||||||||||||||||||||||||||||||||||||||||||||||||||||||||||||||||||||||||||||||||||||||||||||||||||||||||||||||||||||||||||||||||||||||||||||||||||||||||||||||||||||||||||||||||||||||||||||||||||||||||||||||||||||||||||||||||||||||||||||||||||||||||||||||||||||||||||||||||||||||||||||||||||||||||||||||||||||||||||||||||||||||||||||||||||||||||||||||||||||||||||||||||||||||||||||||||||||||||||||||||||||||||||||||||||||||||||||||||||||||||||||||||||||||||||||||||||||||||||||||||||||||||||||||||||||||||||||||||||||||||||||||||||||||||||||||||||||||||||||||||||||||||||||||||||||||||||||||||||||||||
|
Object Type
|
R
U Rating
|
Total number
of individual weapon or ordinace hits to hull
destruction
|
|||||||
| Max Laser | Min Laser | Missile | A.Missile | Torpedo | A.Torp | H.Rocket | S.Bomb | ||
| X-Wing | 20 | 5 | 9 | 1 | 1 | 1 | 1 | 1 | 1 |
| Y-Wing | 40 | 9 | 17 | 2 | 1 | 1 | 1 | 1 | 1 |
| A-Wing | 14 | 3 | 6 | 1 | 1 | 1 | 1 | 1 | 1 |
| B-Wing | 60 | 13 | 25 | 3 | 2 | 1 | 1 | 1 | 1 |
| Z-95 | 14 | 3 | 6 | 1 | 1 | 1 | 1 | 1 | 1 |
| T/F | 9 | 2 | 4 | 1 | 1 | 1 | 1 | 1 | 1 |
| T/I | 16 | 4 | 7 | 1 | 1 | 1 | 1 | 1 | 1 |
| T/B | 28 | 6 | 12 | 1 | 1 | 1 | 1 | 1 | 1 |
| T/A | 14 | 3 | 6 | 1 | 1 | 1 | 1 | 1 | 1 |
| GUN | 28 | 6 | 12 | 1 | 1 | 1 | 1 | 1 | 1 |
| T-Wing | 14 | 3 | 6 | 1 | 1 | 1 | 1 | 1 | 1 |
| R-41 | 14 | 3 | 6 | 1 | 1 | 1 | 1 | 1 | 1 |
| SHU | 23 | 5 | 10 | 1 | 1 | 1 | 1 | 1 | 1 |
| E/S | 33 | 7 | 14 | 2 | 1 | 1 | 1 | 1 | 1 |
| TRN | 38 | 8 | 16 | 2 | 1 | 1 | 1 | 1 | 1 |
| ATR | 95 | 20 | 40 | 4 | 2 | 2 | 1 | 1 | 1 |
| ETR | 119 | 25 | 50 | 5 | 3 | 2 | 1 | 1 | 1 |
| SPC | 57 | 12 | 24 | 2 | 1 | 1 | 1 | 1 | 1 |
| CRV | 188 | 40 | 79 | 7 | 4 | 2 | 2 | 1 | 1 |
| M/CRV | 188 | 40 | 79 | 7 | 4 | 2 | 2 | 1 | 1 |
| FRG | 1520 | 317 | 634 | 53 | 27 | 17 | 11 | 5 | 3 |
| M/FRG | 1520 | 317 | 634 | 53 | 27 | 17 | 11 | 5 | 3 |
| ISD | 2272 | 474 | 947 | 79 | 40 | 25 | 16 | 7 | 4 |
| VSD | 1520 | 317 | 634 | 53 | 27 | 17 | 11 | 5 | 3 |
| INT | 1056 | 220 | 440 | 37 | 19 | 12 | 8 | 4 | 2 |
| SSD | 45712 | 9524 | 19047 | 1577 | 789 | 487 | 322 | 138 | 74 |
| CRS | 2128 | 444 | 887 | 74 | 37 | 23 | 15 | 7 | 4 |
| CRL | 1216 | 254 | 507 | 42 | 21 | 13 | 9 | 4 | 2 |
| STRCK | 1520 | 317 | 634 | 53 | 27 | 17 | 11 | 5 | 3 |
| M/STRCK | 1520 | 317 | 634 | 53 | 27 | 17 | 11 | 5 | 3 |
| DREAD | 1216 | 254 | 507 | 42 | 21 | 13 | 9 | 4 | 2 |
| ESC | 1360 | 284 | 567 | 47 | 24 | 15 | 10 | 5 | 3 |
| TUG | 4 | 1 | 2 | 1 | 1 | 1 | 1 | 1 | 1 |
| HLF | 9 | 2 | 4 | 1 | 1 | 1 | 1 | 1 | 1 |
| CUV | 7 | 2 | 3 | 1 | 1 | 1 | 1 | 1 | 1 |
| CORT | 112 | 24 | 47 | 4 | 2 | 2 | 1 | 1 | 1 |
| MURT | 112 | 24 | 47 | 4 | 2 | 2 | 1 | 1 | 1 |
| FTR | 112 | 24 | 47 | 4 | 2 | 2 | 1 | 1 | 1 |
| CARG | 132 | 28 | 55 | 5 | 3 | 2 | 1 | 1 | 1 |
| CNVYR | 112 | 24 | 47 | 4 | 2 | 2 | 1 | 1 | 1 |
| MTRNS | 112 | 24 | 47 | 4 | 2 | 2 | 1 | 1 | 1 |
| CN/A | 36 | 8 | 15 | 2 | 1 | 1 | 1 | 1 | 1 |
| CN/B | 36 | 8 | 15 | 2 | 1 | 1 | 1 | 1 | 1 |
| CN/C | 16 | 4 | 7 | 1 | 1 | 1 | 1 | 1 | 1 |
| CN/D | 28 | 6 | 12 | 1 | 1 | 1 | 1 | 1 | 1 |
| CN/E | 36 | 8 | 15 | 2 | 1 | 1 | 1 | 1 | 1 |
| CN/F | 36 | 8 | 15 | 2 | 1 | 1 | 1 | 1 | 1 |
| CN/G | 36 | 8 | 15 | 2 | 1 | 1 | 1 | 1 | 1 |
| CN/H | 36 | 8 | 15 | 2 | 1 | 1 | 1 | 1 | 1 |
| CN/I | 36 | 8 | 15 | 2 | 1 | 1 | 1 | 1 | 1 |
| PLT/1 | 1520 | 317 | 634 | 53 | 27 | 17 | 11 | 5 | 3 |
| PLT/2 | 1520 | 317 | 634 | 53 | 27 | 17 | 11 | 5 | 3 |
| PLT/3 | 1520 | 317 | 634 | 53 | 27 | 17 | 11 | 5 | 3 |
| PLT/4 | 1520 | 317 | 634 | 53 | 27 | 17 | 11 | 5 | 3 |
| PLT/5 | 1520 | 317 | 634 | 53 | 27 | 17 | 11 | 5 | 3 |
| PLT/6 | 1520 | 317 | 634 | 53 | 27 | 17 | 11 | 5 | 3 |
| FAC/7 | 1520 | 317 | 634 | 53 | 27 | 17 | 11 | 5 | 3 |
| R&D | 1520 | 317 | 634 | 53 | 27 | 17 | 11 | 5 | 3 |
| LASBAT | 1520 | 317 | 634 | 53 | 27 | 17 | 11 | 5 | 3 |
| WLNCHER | 1520 | 317 | 634 | 53 | 27 | 17 | 11 | 5 | 3 |
| SHPYD | 4560 | 950 | 1900 | 158 | 79 | 49 | 33 | 14 | 8 |
| GPLT | 32 | 7 | 14 | 2 | 1 | 1 | 1 | 1 | 1 |
| REPYD | 4560 | 950 | 1900 | 158 | 79 | 49 | 33 | 14 | 8 |
| SAT | 0 | 1 | 1 | 1 | 1 | 1 | 1 | 1 | 1 |
| Mine/A | 0 | 1 | 1 | 1 | 1 | 1 | 1 | 1 | 1 |
| Mine/B | 0 | 1 | 1 | 1 | 1 | 1 | 1 | 1 | 1 |
| Mine/C | 0 | 1 | 1 | 1 | 1 | 1 | 1 | 1 | 1 |
| Probe | 0 | 1 | 1 | 1 | 1 | 1 | 1 | 1 | 1 |
| Nav 1 | 0 | 1 | 1 | 1 | 1 | 1 | 1 | 1 | 1 |
XvT Starfighter Warhead Loadout
*Charts based on standard ship loadout. Damaged based on: Missles(3000), Advanced Missles(6000), Torpedo(10,000) Advanced Torpedo(15,000), Heavy Rocket(35,000) SpaceBombs(65,000) **Although magpulse warheads do no damage to a target. They disable a ship's weapon systems. Approximate downtime is 30 seconds for capitol ships and 20 seconds for fighters per each magpulse. |
|
Welcome to the CRS Vigilant's blindspot guide for X-Wing Alliance craft. Click on the links below to view information which includes the location of the blind spot along with pictures and filmclips to help you find your way. The information also lists engine wash and the turbolaser range of the craft. In addition, please take the time to read our added notes on attacking XWA craft. Please click on the appropriate link to bring up the desired X-Wing Alliance blindspot data. |
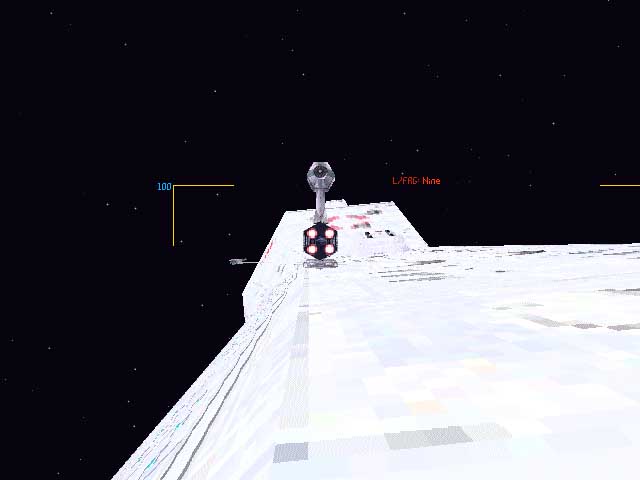
XWA Blindspot Guide - Heavy Starships
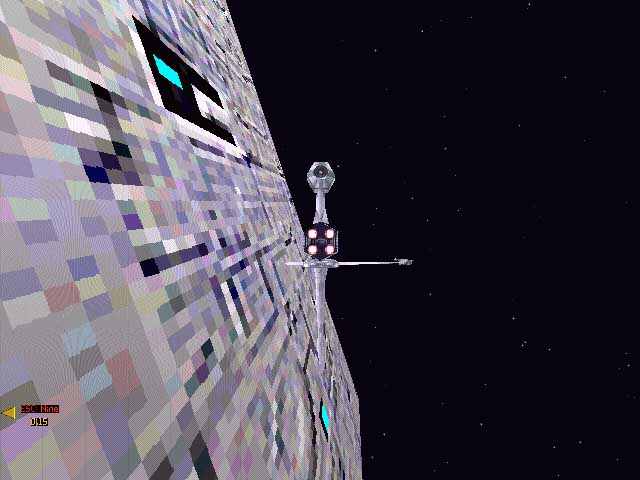
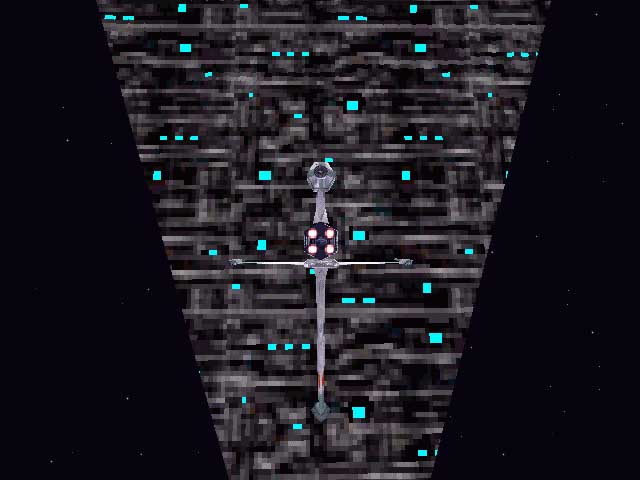
This blindspot is located right next to the large raised section that the bridge is attached to. Come in from a side and slow as you get close to the blindspot. As soon as you get into to the area, try putting yourself about even with the bridge. Once you are in position, you should be able to easily finish off the cruiser. Download the filmclip of technique.
This blindspot is located towards the front of the ship, right in between the two protrusions on either side. Come in slightly above the ship and in the middle, once you get over the ship, turn to the right and head down into the blindspot. You need to make sure that you are close to the front of the protrusions, or its guns will be able to target you. Download the filmclip of technique.
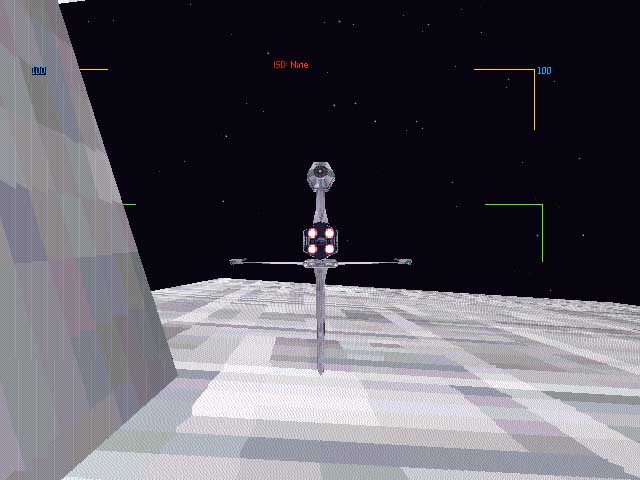
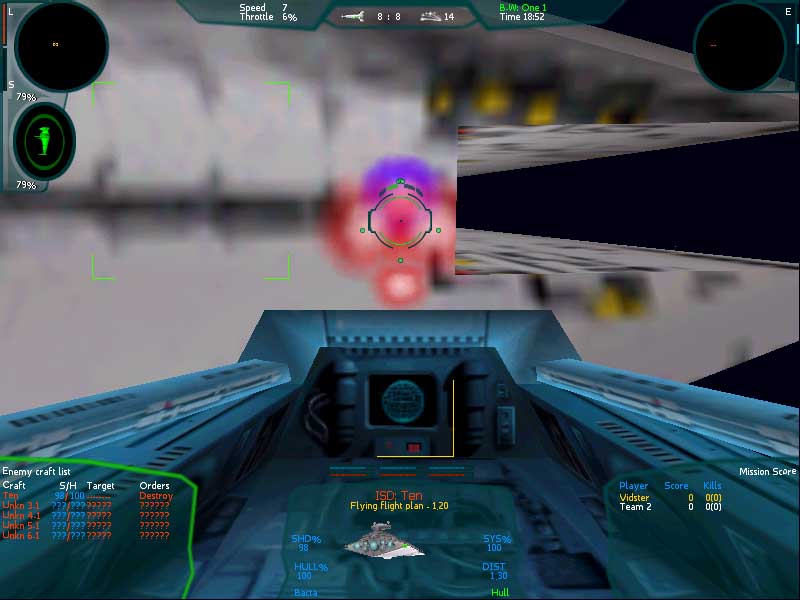
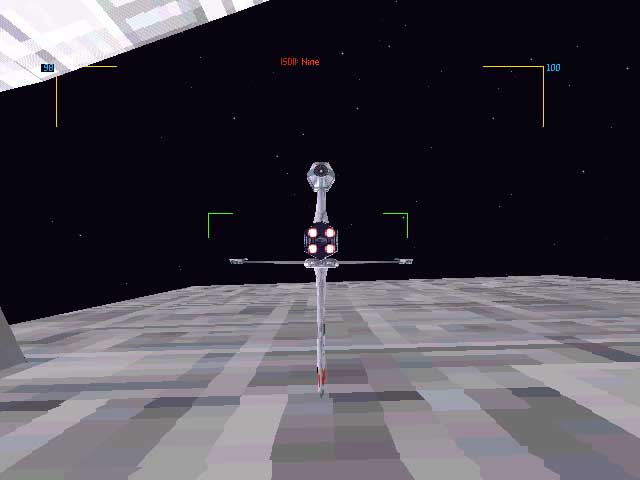
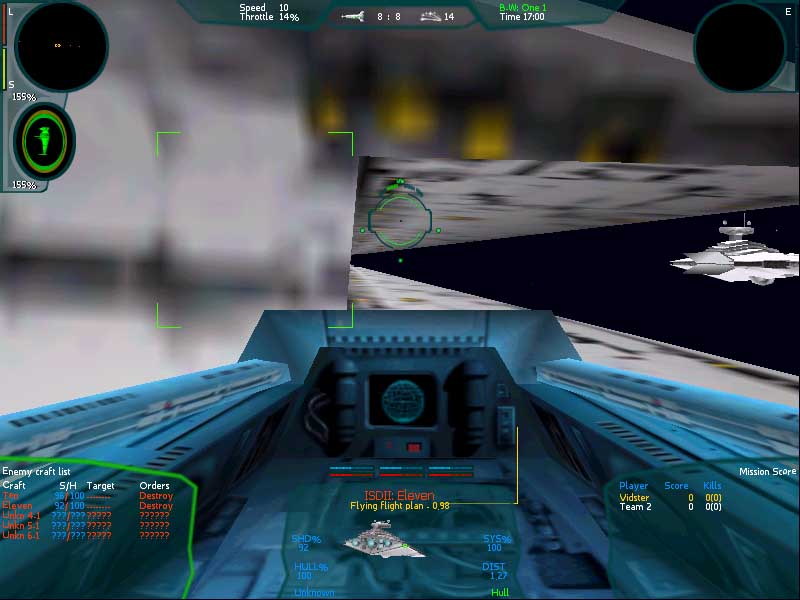
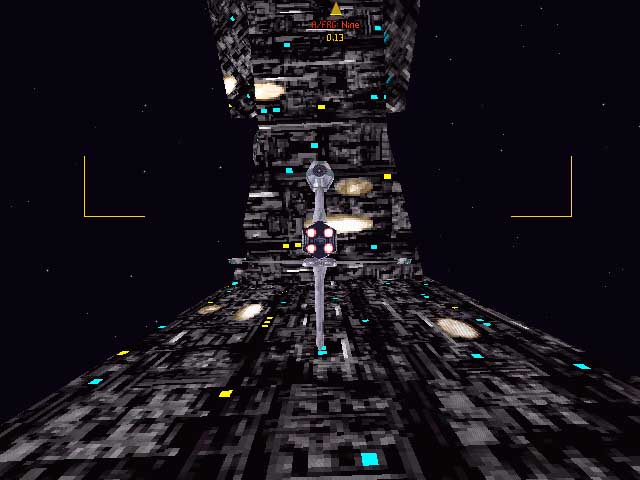
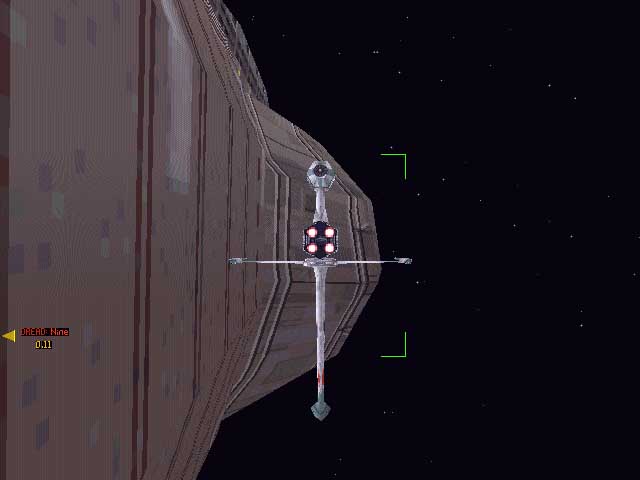
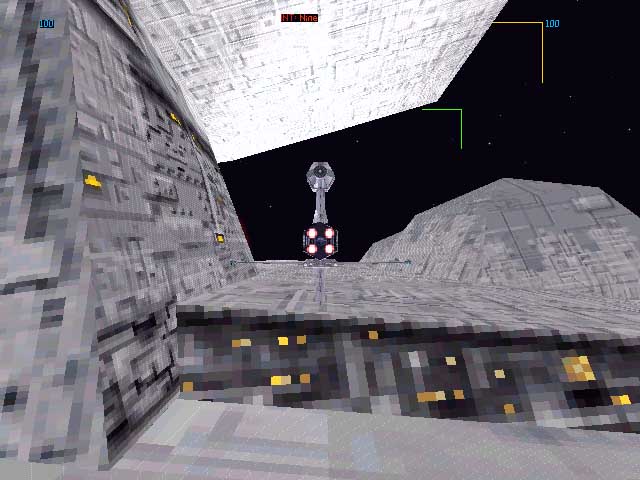
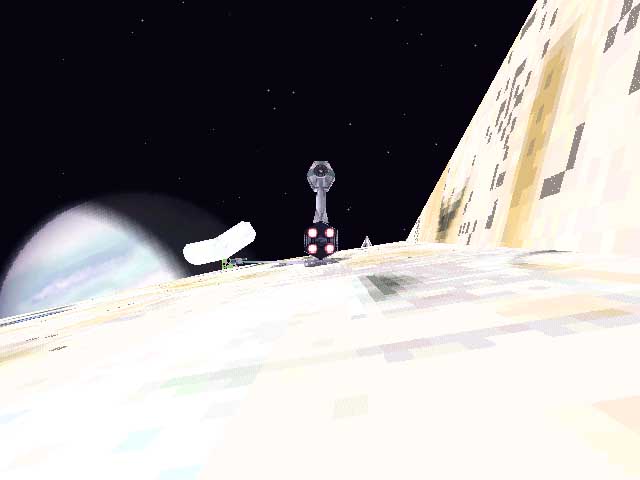
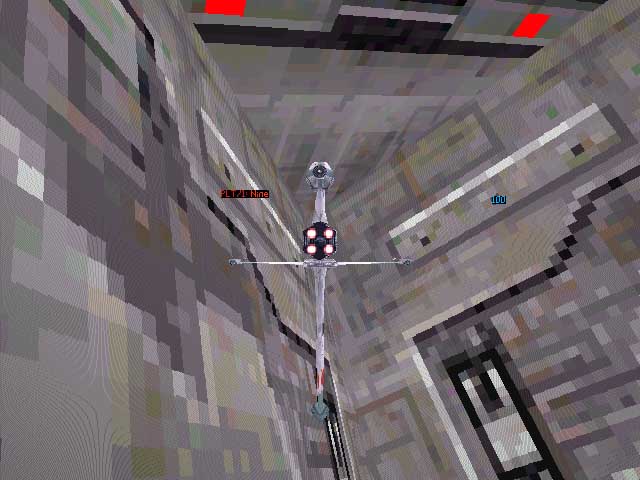
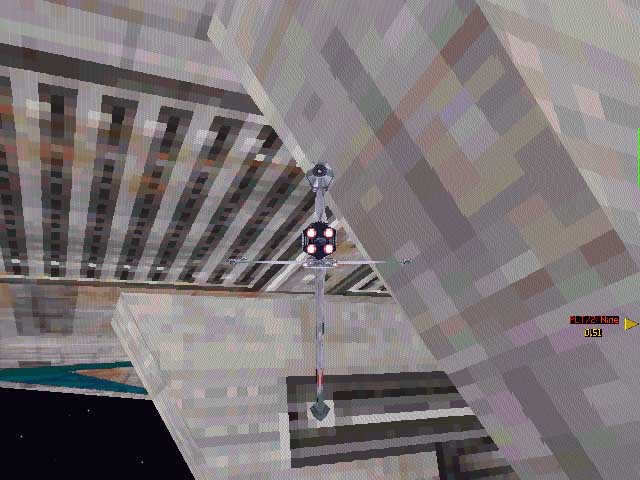
There are probably several blindspots located on this ship. The blindspot that was first located lies right between the bridge and the ship structure under it. You need to be up almost even with the front of the bridge so the turbolasers can't target you. This spot is a real good one because you don't have to worry about crashing if it changes direction on you. To get into this blindspot, come in from the back of the ship, but don't start cutting too much speed till you are under the bridge. Once you get under it, match speeds and destroy it. The secondary blindspot is located along the port and starboard edges on the aft section of the ship. The engine wash fails to completely cover the aft section, but care should be taken to avoid the engine wash. Your best option is to keep close to the port or starboard edge - almost in the trench. It is important to keep alert when in this particular blinspot. If the starship decides to turn suddenly you may find yourself meeting the hull if you don't hit the throttle quickly enough. A third blindspot (not pictured) on the ISD can be found within the aft-most "trenches" on either side of the ship. While not pictured, this blindspot is easy to identify and execute. However, this particular spot leaves you vulnerable to sudden changes in the ISD's heading. Download the filmclips of technique.
Though this is the "upgraded" version, it shares the same blindspot as the ISD. Just follow the same tactics to get in, and if you do it right, this one will fall just as quickly. The secondary blindspot exist for this enhanced version of the Star Destroyer. However, the engine wash extends a bit further to the edges of the craft. You will need to position yourself just on the edge of the trench to avoid the engine wash.
This ship has been upgraded considerably from XvT. It no longer has that nice big blindspot in between the buildings. Now however, it has many small blindspots scattered around the ship. One of these is located on the sides of the ship; you can fly in and blast away without worrying about its turbolasers. You do need to be careful, because there are places where there are lasers on the sides. If you happen to come into one of these areas just go forward or back till you are out of its range. It is best to approach this blindspot from a side and evade the SSD's turbolasers as necessary, if you do it right; you can get in without taking a hit. Download the filmclip of technique.
This is another ship that had a few upgrades done to it since XvT, though they may have made it's main blindspot a little smaller, with a bit of practice, you will be able to easily destroy these ships. The blindspot is located in between the "wings" of the destroyer, instead of being able to just sit in the main area, you now have to fly down into the little trench in between the wings. You will get hit a couple of times on the way in, they added a laser or two that can fire into the old blindspot. Once you get into the trench, move close to the "wall" in front of you. Once you are no longer getting shot at, bump up your recharge rates and match speeds. You shouldn't have any trouble finishing it off. Like its larger ISD cousins, the VSD has the same hind quarter blindspot. Unfortunately you need to keep very close to the hull. there are a number of laser emplacements on the outside edge that will hit you as you drop your throttle to match speeds. Make sure your shields are charged and then move in. Download the filmclips of technique.
Another upgraded version of an older ship. This one still shares the same blindspot as the older VSD. The secondary blindspot on the VSD II is identical to that of the normal variety VSD . Follow those instructions that are listed above. |
XWA Blindspot Guide - Medium Starships
This blindspot is located between the bottom wing and the protrusion in front of it. It is recommended that you come in from the bottom, cutting speed as you get closer. Once you get in, match speeds and finish it off. Download the filmclip of technique.
This blindspot is located where the neck of the ship meets the bridge. Come in from the rear and the side, almost parallel to the dreadnaught. As you get close start cutting speed and match speeds as soon as you are in position. Download the filmclip of technique.
This blindspot is very similar to the one in XvT. Come in from behind the carrier and cut speed as you get close. Get up right next to the hull where it slopes back and match speeds. From there you should be able to destroy the ship. Download the filmclip of technique.
This ship has a blindspot that is very similar to that of the ISD and ISD II. Just come in from the back, but on this one, you want to make sure you are directly under the bridge. Once you are in, you can move over to the left or right a little and shoot at the shield generator in front of you. This medium starship shares the same secondary blindspots as the other heavier class of Star Destroyers. This is probably the easiest of them all to get into. There are very few laser emplacements along the rear and the engine wash gives you a wider area in which to maneuver. Download the filmclips of technique.
To reach this blindspot, come at the cruiser from slightly above and almost perpendicular to it. As you get closer, start turning towards the front and head towards the left side of the right engine. Once you get close to the hull, keep going till you are near the front of the engine, or the turbolasers can target you. Once the guns stop firing, match speeds and finish it off. Download the filmclip of technique.
This ship is another that has the same blindspot as it did in XvT. However, this one is one of the more difficult to get into due to its small size and the amount of firepower of the frigate. It is located directly behind the docking platform and very close to the hull. Come in from behind the frigate and drop your speed as soon as you get next to the blindspot. Use the speed you have left to maneuver over and then match speeds with the frigate as soon as you are in position. Download the filmclip of technique.
The blindspot on the frigate is much easier to exploit than it was in XvT. Come in from the top and get right above the docking platform. Match speeds and blast away at the hull in front of you. Download the filmclip of technique.
This ship also has a blindspot that is the same as it was in XvT. With only one laser near the nose, just come up from behind and slightly underneath. Once you get within range you should have no trouble finishing it off. Download the filmclip of technique. |
XWA Blindspot Guide - Light Starships
This blindspot is located behind the front most protrusion. Come in from behind and slightly below the cruiser and you should be able to reach it without any problems. Download the filmclip of technique.
This blindspot is one of the most simple to reach, and it is the same as for XvT. Come in from the back and stay directly behind it and it can't shoot back. Download the filmclip of technique.
This blindspot is located on top of the frigate over to one side right next to the hull. It is recommended that you come in from the top and aim for the center of the frigate, once you get close cut your speed and get right up close to the hull to prevent the guns from firing on you. Once you get into position, this frigate will be destroyed quickly due to its small amount of shields and rather weak hull. Download the filmclip of technique.
This blindspot can be difficult to reach due to its small size and the speed of the corvette. It is located under the corvette right in between the wings. Generally it is best to come at it from the back and underneath it. Most of the guns are located on the top, though there are a couple on the sides. Keep an eye out for it's waypoints and be prepared to evade if one comes up, though it is lightly armed, it has enough firepower to quickly take out most fighters. Download the filmclip of technique.
This starship also has the same blindspot as it did in XvT. It is also the same as the Corrillean Corvette. Just fly in directly behind it and you should have no problems. Download the filmclip of technique. |
XWA Blindspot Guide - PlatformsA note on Platform Blindspots: If you do not see a platform on this list, it does not have any weapons and is not considered a threat. Therefore, no blindspot is necessary.
This blindspot is the same as it was in XvT, come in from above it and cut speed as you close, to make sure you don't run into it. Just get close to the hull on the top and blast away. Download the filmclip of technique.
This platform has a blindspot on each end, in what appears to be a landing area, just fly in there and the guns can't target you. Download the filmclip of technique.
This blindspot is located in the indented area of each end. Come in straight at it and slow down as you get in to avoid ramming the platform. Download the filmclip of technique.
This platform has a blindspot underneath it. All you have to do is come in from the bottom and get right up close to the hull. The lasers won't be able to target you and you will be able to finish it off without any problems. Download the filmclip of technique.
These platforms all have a very similar blindspot that is located in the triangular protrusions under the platform. Just fly inside and blast away. If you get to close, they may have a jamming beam in place, to counter this, just turn around and head away slowly, you will hear when the jamming beam is off. Drop your speed back to 0 and turn around. Download the filmclip of technique.
These platforms didn't have a blindspot in XvT. They do now. All you have to do is fly in from underneath and get yourself right up close to one of the vertical protrusions underneath. Get closer to being between them and you will be able to finish it off without any problems. Download the filmclip of technique.
This blindspot is located on the far side of the asteroid from the hangar entrance. Look for the indented area, and you will be close, once you find it once you can find it again. Download the filmclip of technique.
This blindspot is located between the two "poles" that are located on one side of it. You need to be fairly close to the main structure of it to avoid the guns on the towers. Download the filmclip of technique. |
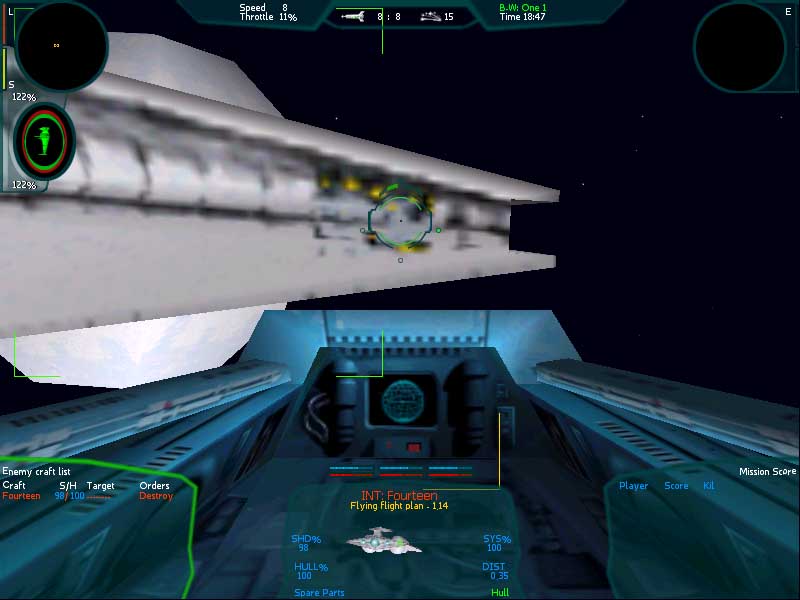
Assaulting XWA StarshipsBy Krayt, Rogue 7 Therehave been several changes from X-wing vs. Tie Fighter when it comes to starships. The first being that most of them have a much longer range than they did previously, though their long range turrets are actually much less accurate than they were in XvT -- short range lasers remain about the same. While the debate of difficulty of the longer turbo ranges is still open, it is quite clear the creators of XWA wanted to make attacking a capitol ship a continuous effort. If you escape beyond the laser range to recharge the chances are good that the cap ship shields will have improved their strength. This requires you to constantly dodge the turbo laser fire and stay within range of the cap ship. Another change is the omission of actual turrets on most starships. They now have a little box that is labelled weapon systems on your targeting computer. Shooting these has the same effect as blowing up the turrets in XvT. Also, starships now recharge their shields at a much faster rate, not faster than you can deal out the damage, but enough that it can recharge to full strength if you get occupied with something else. Starships now target and shoot at all incoming warheads that are locked on to them, even from far away distances. This makes normal tactics of locked warheads almost useless. Like XvT, the best approach is to dumbfire all of your warheads at the capitol ship. Dumbfiring requires a bit of practice to perfect, but it is better than seeing your torpedoes explode under a hail of laser fire a few meters away from the hull of your target. Many of the blindspot film clips that are available for download demonstrate the dumbfiring technique that should be used in order to insure that your warheads hit your target. Yet another noticeable change within the flight engine is that colliding with a capital is no longer fatal, instead your shields will absorb damage. This makes getting into the blindspots a little easier. With the provided blindspot data, you should be able to easily take down just about any of the starships in the game with a little practice. |
|
Been out on extended patrol or assignment? Missed a few months of Routine Orders? Never fear, here you will find archived copies of Bridge logs from both the Vigilant and Liberty. |